Disclaimer: I apologize in advance, that this post won’t have a plethora of pictures. I was in a rush to get to a ride when I did this work, but I will use what pictures I can to illustrate, and try to fill in the gaps as best I can.This is not an official guide and I make no claim that it is complete or whatever.
To begin with, I REALLY like the Mattoc. It has gotten a couple of reviews online (Pinkbike, VitalMTB, maybe others), and I’ve seen one sort of review in print (BIKE magazine Bible of Bike Tests issue).
There is a great resource for changing travel using the travel spacers (that you should get with an aftermarket fork) and it can be found HERE. I have not, however, found a teardown / rebuild of the damper side.
I have no desire to tear the entire damper apart, but to refresh the oil in the damper side I was able to piece together the information needed using this MTBR forum thread, as well as talking to Erik at Hayes Group to get the final details. Manitou is promising the official guide any day now, but I can give this to you guys NOW. So here it is.
Manitou Mattoc Pro Damper Removal and Re-assembly:
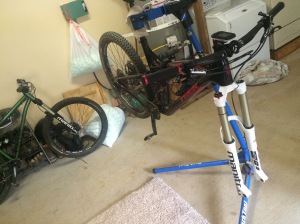
First off, remove your wheel, blah blah blah (do I really have to tell you this stuff?). Remove your brake caliper and tie it to your handlebar or somewhere else safe (for your bike and your brake).
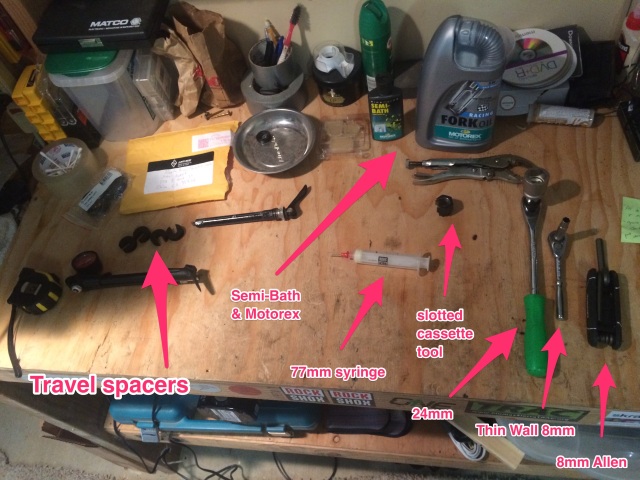
Next, I always make sure my tools are laid out and ready to go. To complete this task you will need the following:
- Tape Measure (that has mm designations)
- Shock Pump
- Semi-Bath and 5w fork oil (I use Motorex whenever possible)
- A syringe or other device to remove oil from the damper side to a specified depth
- Manitou Mattoc Tool Kit
- Slotted Cassette tool (with some sort of wrench to turn it – I’m using vise grips)
- 24mm flat ground socket (Not really needed for the damper service)
- 8mm thin wall socket
- 8mm and 2mm Allen wrenches
- 13mm socket
- drain bucket (to catch extra oil)
Now remove the rebound adjuster knob with a 2mm allen wrench, and prepare to remove the lowers (Manitou calls them the “casting”). Let the air out of the spring side, which is generally helped by turning upside down to prevent oil from spewing everywhere.
Unthreading the damper side with the 8mm allen wrench and the air spring side with the 8mm thin-wall socket will allow you to pull the casting down and let the oil drip into the bucket of catch basin. It should be noted that both of these appear to be REVERSE threaded. This isn’t actually the case, since the inner piston shafts are technically threaded into the inside of the stanchion tube, but functionally, this is how it appears when removing them from underneath. After the dripping subsides you can remove the casting, wipe it down as needed and set it aside.
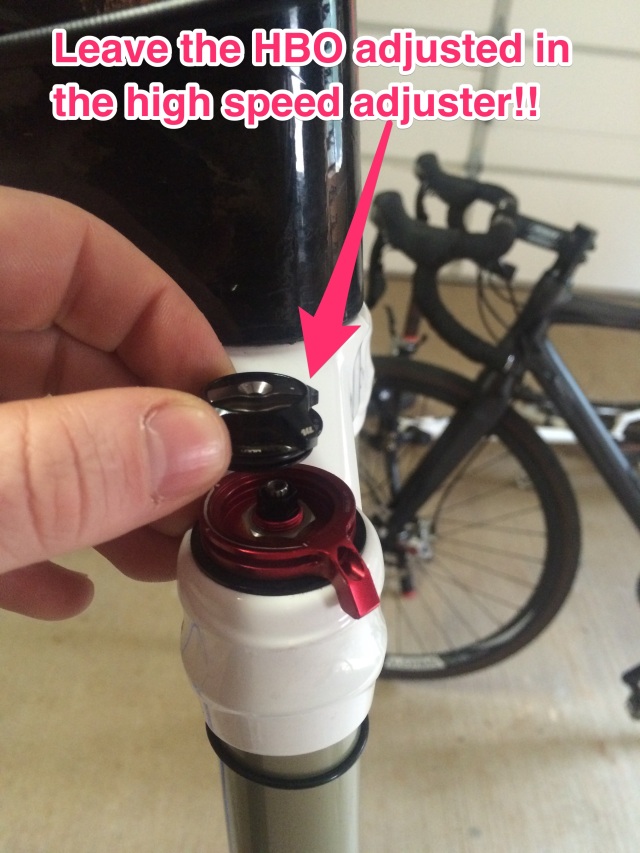
Next, remove the damper adjusters and remove the damper. A 2mm allen wrench will remove the screw from the center of the HBO adjuster and you can then pull the high-speed damping adjuster up to remove BOTH the HBO and High-speed adjuster. If you try to remove the HBO alone you will have 2 tiny springs and ball bearings fly out and ruin your day.
A 13mm nut holds the low-speed adjuster onto the damper head. Make sure you turn the low-speed adjuster all the way down (towards the negative, or less damping) to allow for the least resistance to removing the damper.
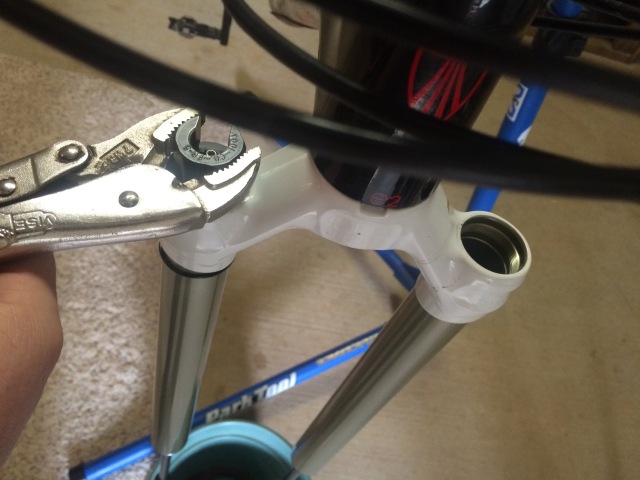
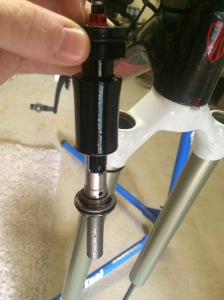
Use the slotted cassette tool and some form of wrench to unthread the damper from the upper and slowly pull the damper out using a controlled motion. Some wiggling may be required to keep from damaging the o-ring at the top of the damper threads. There is a thick silver washer that rests in the top of the damper to space out the low-speed adjuster. Just keep an eye on it – it will usually stay put.
You will notice that the oil in the damper at this point will be very aerated. It it a good idea to let this aeration dissipate before you proceed. Go drink a beer or watch some cartoons…..
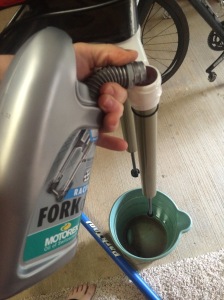
At this point you are either completely changing the oil in the damper side or just doing a level refresh or check. If you’re changing the oil completely, pour the oil out of the top of the damper side. If you are just checking and verifying the oil level, wait until the aeration has off-gassed, and pour in / refill your 5w fork oil to the bottom of the threads inside the uppers. Motorex 5w is recommended. When the damper is removed it will have some oil inside its workings so you will need to add some oil regardless. My take on this is if Manitou is specific enough to tell you “77mm on the Pro and 80mm on the expert” that the few cc’s of oil lost in the damper when you remove it needs to be allowed to drain, and then needs to be replaced in the upper tube before re-installation.
At this point you turn your rebound adjuster all the way slow and then back it out 2 clicks. Now you will begin cycling the damper shaft SLOWLY 25 times (or so) up and down, up and down, up and down….. If you feel any cavitation or air bubbles you should keep going. I found after doing this several times that if you cycle up and let it sit for minute, then cycle down and let it sit, you can can speed up the process. You will feel a silky smooth motion without the feeling or sound of air after a while. Remember – this is to get the best feel out of your fork – DON’T RUSH IT. 25 times is just a minimum, you will likely have to go longer. Cold temperatures slow this process down as well.
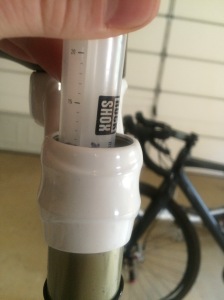
With your damper shaft feeling like soft butter, you will now refill the damper side to at least the bottom of the threads in the uppers, and let it sit to get any new aeration on top to off-gas. Try to pour slowly and in a controlled manner to prevent this. This next part is also critical, so think carefully about how you will accomplish this with tools you can get your hands on. I use a RockShox syringe that came with my Reverb dropper post, and a small piece of tubing, then measure and mark the syringe accordingly:
I have also seen other people using interesting devices (from the “Manitou Mattoc” thread on MTBR),
but the critical thing is that you can remove oil down to 77mm (for the Pro) from the top of the upper shaft BEFORE you reinstall the damper. This 77mm is measured from the top of the stanchion tube, and you can just suck out the fluid until all you get is air:
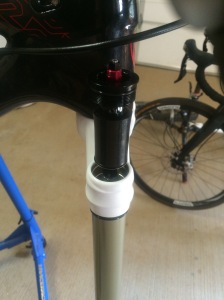
When you prepare to re-install your damper unit, make sure the low-speed is still in the position of least damping for the easiest installation. Wiggle / slowly push the damper back down and begin re-threading it into the upper. When tightening the damper down, it should be tight, but don’t wail on it – I was warned about collapsing threads. I snug it and then give it a very small extra pull. I do not have a torque spec for this. The torque for the air cap on the other side is 60-80 in lbs [6.8-9.0 Nm]. From here you can reinstall the adjusters at the top of the damper.
At this point you can change travel in the air side if needed. I am not going to go through all this, but I will say that the 7cc of semi-bath that is recommended in the guide seems to give a lot of people trouble. I grease the positive air piston seal with slick honey, add a small dollop to the top, and then add 2cc of semi-bath in the top once installed.
NOTE: Manitou Tech has corrected this last bit for me (us). They do NOT recommend using Slick Honey anywhere in their suspension products. They recommend using M-Prep Grease on these seals and then adding 3cc of Semi-Bath to the top of the piston. (Thanks Erik)
When you remove your air-shaft – release all the air and take off the top cap first and then pour out any oil from the top side. If you get a lot of oil pouring out after you pull the air shaft out from the bottom, you likely had oil migrate to the negative spring side – this can cause a loss of sensitivity and extra harshness. I felt it and am using this solution for now – it seems to be working good for me.
Finally, air up the spring side to 20-50 PSI to make sure the rod stays out, and pull the rebound shaft out to full extension. Pour in 8cc-15cc of semi-bath oil in each lower leg when reinstalling the casting. Torque for both sides is 30-40 in lbs [ 3.5-4.5 Nm]. Finish airing her up, get your wheel and brake caliper back on, and take her for a ride!
EDIT: Couple of Notes from Manitou Tech:
- Place a bead of m-prep in the groove below the oil seal and between the dust and oil seal. This will get that fork felling like butter and should remove any inconsistent feeling.
- Fully extend the fork with the pump connected before filling with air. If the fork is not fully extended it will have this dead stroke feeling.
- You should lubricate the air piston and fill the piston cup half way with m-prep. Only 3 cc of semi bath should be placed on top of the piston.
If this was helpful, let me know. If I missed something or you found something different, let me know.











Ηι
Firstly thank you for the great article.Secondly can you please tell me what sort of problems do people have by adding 7cc of semi-bath oil and why you prefer adding slik-honey and 2cc of semi-bath oil? For me is working OK with 7cc and i am getting 156mm of travel(i think you have no more travel) when i push hard but with bottom-out resistance full off.
Thank you in advance
Haris
LikeLike
Thanks, I’m glad this has been helpful! Some people have had oil migrate from the positive air chamber to the negative, making for a slightly harsher ride. It sounds like you are not experiencing this, so I wouldn’t worry about it too much unless you feel the plushness of the fork diminish. Then I would investigate. As for the 156mm of travel, that is about what you should get, though while riding a very hard hit would likely get you those last 4 mm!
LikeLike
I will open the fork and will follow your instruction about semi-bath oil. I will test it and i’ll infom you all about the result.It seems that 156mm(pike is 159mm, sweep 158mm and almost no fork is actually 160mm) is the max because i only reached it in very big jumps and hits. What i want to achieve now is to to make the bottom-out resistance more ”friendly” and not having it all the way open all the time.
LikeLike
Let me know what you find out! The more info we can get out, the better. I would also like to know how much oil (if any) comes out of the negative air spring chamber when you take it apart. If you open the top and pour out any in the positive chamber, then you’ll get an idea when you remove the air spring assembly from the bottom of the upper tube.
LikeLike
First ride after the service and i feel like…what was i riding all that time? Perfect dumping, extra support and NO stiction at all. I mean ..the fork was almost perfect before .But now…no words.
When i opened the positive air-chamber there was no oil at all.Not a single drop. Unfortunatelly all of the semi-bath oil was in the negative chamber and there was too much oil inside. What is more the rebound safety lock that holds the 2 springs was out of place.Fortunatelly the springs and the 2 little balls were in their place. One the spring side the upper rubber bumper not the bottom out one was teared off nand i had to changed it. Since i did not have the actual spare part i replaced it with 2 thicn o-rings. First test was OK and actually i did not notice any deference when bottoming out the fork.
I replenish the semi-bath oil with 10cc of lighter torco 20w oil (60cst @40C intead of 90cst@40c of 5-40 motorex) in each lower leg. I did something different in the spring side though. Instead of using Prep-M or Slik honey or any other super fine grease, I used 100,000 cst silikone oil both in the o-rings and the positive air chamber. I used 1,5 cc intead of 3cc of semi-bath oil. This product is so thick and it stays all over the surfaces once spashed, so i believe that is the best solution for having the least oil migration from one chamber to another, plus is neutral and haws excellent lubrication properties.
I will opened oit again in few weeks and i will inform you with more inside results.
LikeLike
Thanks so much for the write up with pics. I foud you from our link on the MTBR forum.
Like others there Ive been hearing from Manitou that a full video of the service was going to br put up but thats been months now and no vid.
Just one thing I wanted to clear up: for replacing the damper fluid completely after it’s been drained, you pour th enew stuff in while the compression damper is removed. Then cycle the rebound, THEN check and adjust the oil height as necessary, correct? Then after your oil height is correct you then replace the compression unit?
Thanks again for the write up
LikeLike
You got it. Fill, cycle, adjust to level, close up. Thanks for the question!
LikeLike
So I rushed in before seeing your guide and took the HBO off on it’s own. As you said, my day was ruined spent on my hands and knees finding the ball bearings and springs. I have two of each, but no idea how they go back into the indents?
LikeLike
Look at the HBO adjuster on edge, you’ll see two holes across the thick part, opposite each other. Spring first, then ball bearings, then drop in the high speed adjuster. Glad you found them though! Took me hours on beige shag carpet!
LikeLike
Thanks very much, I worked it out in the end. They are tiny buggers!
LikeLike
Thank you for youyr post, very usefull, cheers from France!
LikeLike
Great write up. I use this and the mattoc service video when servicing my Magnum Pro. Manitou now suggests using slickoleum where they previously recommended prep-m grease. Here’s the video link for reference:
LikeLike
Hey RCS,
Thanks for the detailed write up!
I have a problem with my Mattoc that you may have some insight into.
I have a 2016 Mattoc Expert 27.5 with the IVA kit installed – 1 spacer in.
I’ve adjusted travel to 150mm, and put 7cc of oil in both legs.
My fork does not give full travel, and I only get 120 – 125mm with the last 25mm at the top sitting unused – even on huge jumps. I’ve let out all air and checked travel – and that’s it, 120 – 125 is all there is. It does not feel harsh, and I’ve never felt the fork bottom or top out.
Funny thing – the 125 it feels plenty, but looking at the o-ring, it is definitely only giving me that 125mm, and I’d really like to access the extra 25mm
I’ve tried the upside-down trick before tearing the fork down again. With all the air out I don’t get full travel (compression), it’s like hitting a bumper/stopper/bottom out elastomer with around 30mm left on the stanctions. Full stop – not cushy, and not like a metal on hard surface stop, but a dead stop nonetheless.
Even with all my weight on the fork, brake locked that’s the limit. 30mm unusable travel.
The trouble is actually at the damper side if I have to hazard yet another guess.
I opened my fork to follow your process above and found where I believe the problem is, but no insight into why or how to fix it.
If I take the damper out – the damper shaft has full travel, but as soon as the damper is in – the rod bottoms out (stops in its tracks) using 120 – 125mm of travel.
This should narrow it down, and maybe give you some idea?
I’m baffled.
Thanks!
LikeLike
flip, just finetuned the oil level and boom – sorted, at long last!
Thanks again for the write up!
LikeLike
Nice. I’ve found these to not be ridiculously sensitive to oil level, but a lot of travel restriction or bottom out issues are solved by checking. Also I have heard that forks can come with pincorrect levels for one reason or another. I always open and check a new fork just to be sure.
LikeLike
Hey there thanks for the article. I’ve just built up a hardtail around a 160mm Mattoc Comp. Oddly it’s one that has the same Dorado Air Spring as the others (not the Mars as advertised). Just wondering what you’d think would be a good level to go for? 77 like the Pro?
LikeLike
Just a heads up on the oil. It’s 15cSt which in Motorex is 2.5wt, not 5wt. Manitou confused everyone by having pallets of 2.5wt oil relabelled as 5wt a decade ago.
LikeLike
Def good to know. I’ll update the write-up to be sure and remind folks to check.
LikeLike