I’ve been lax, so I’m condensing two posts into one. Eh. I’ve got a full time job and a part time job and usually wear myself out to the point of being lazy because, well, I’m lazy. I also realize that these posts are out of order. I was excited when I dropped into the trail today, and wanted to test posting from my phone. So here it is:
How did I get to this point? I’ll start with another plug for Ethan at DirtMerchant, for hooking up parts batch #2.  He put up with constantly changing lists of parts and costs, helped me work through some thoughts on what to build, and provided deals cheaper than what you can find parts for at the “Big 5” online retailers. Shipping was a breeze and always included in the prices, and parts got to me within 4 business days, every time. I’ll be stoked to stop in and say hi on my drive to NC in August, sip some whiskey and hopefully ride a trail or two.
What came this time:
- Shimano Zee Cranks, 170mm
- RaceFace 34T Narrow/Wide Chainring
- RaceFace Atlas stem, 65mm
- RaceFace Half Nelson grips
- SLX brakes, front and rear
- 160mm and 180mm Hayes rotor with adapters
- SRAM X7 Type 2 derailleur and X7 shifter
- SRAM 1070 Cassette, 1071 chain
- Don’t forget the Handlebar I already had…
Now I’m going to get a RaceFace Atlas bar (need wider) and a set of Chromag Contact pedals, but I wanted to get up and rolling so used what I’ve got on hand for now. I also ordered a black On One decal to (mostly) cover up the orange decal and make the bike “blacker” cause that’s what I had in my head.
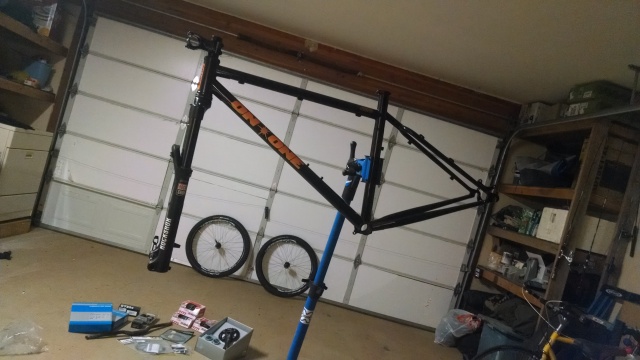
The Build: I only have a certain amount of tools. Some tools are just too expensive to own, and I’ve got a good local shop that I like to frequent, preventing the need for things like presses and compressors, etc. I had the headset installed, the steerer on the fork cut, and the star-nut installed at North Rim Adventure Sports:
From here, I took to putting the rotors on the wheels and making this a rolling chassis. T25 torx driver required, but Hayes was nice enough to put one in each rotor package (score!). From there check the pressures and put the wheels on the frame.
Next, on with the handlebar and dropping in the Reverb seatpost (we’ll deal with hose cleanup later, when we have the rear brake on).
And now, the cranks. The bottom bracket on these requires a special wrench, and since the shell on the frame is 73mm, only one spacer, on the drive side, was required. Often, cranks come with instructions adequate to figure out what spacers to use. I have forgotten, however, what the setup was supposed to be since I haven’t built a bike since 2010. I used this forum page from MTBR to figure it out (never underestimate the ability to find information on the web):
I had to remember the shell width, the fact that I remembered spacers are 2.5mm each, and that 3 were provided. The other common shell size is 68 (5mm , or 2 spacers smaller than mine). Think about it, or draw a diagram, and you can possibly see that one spacer is almost always needed, since there are so many things that you can add in place of a spacer (chain guides, front derailleurs, etc). Since those things are common to use, it makes sense that when you get a 73mm BB, one spacer would be built into the design, even when interfacing with a 73mm shell. Also installed the Forte flat pedals on the crank arms. I do not use clip-in (sometimes called clipless) pedals. Long story. No, it’s not. I just don’t like them. I shift foot position A LOT when riding, and I feel I can modulate power transfer better.
Next, brakes and levers. I bolted the brake calipers to the adapters, the assemblies to the frame and fork, test fit the levers, and added the RaceFace Half Nelson grips. I also placed the rear shifter lever and rear brake lever (no pics of that though).
Next was the rear derailleur and rough cable routing. I used this video by Performance Bike to brush up on adjusting the rear derailleur:
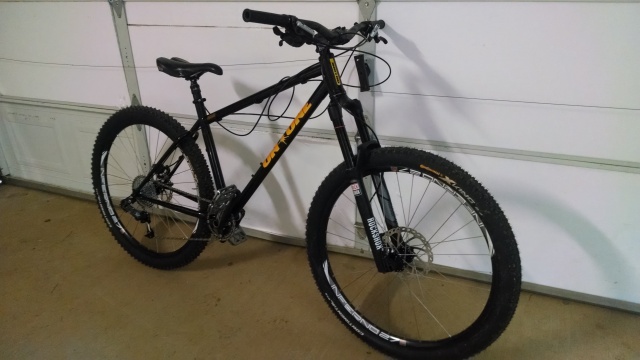
Here we are. All that is left is shortening and (if needed) bleeding the Reverb seatpost and the rear SLX brake. SRAM (RockShox) sends the bleed kit with their Reverb seatpost, but don’t be fooled – this is a tricky process.
To prepare for these two most nerve-racking processes, I combed info on the web (interweb). Shimano brake hose shortening instructions (awesome guy):
http://www.epicbleedsolutions.com/blog/shorten-shimano-hoses-without-bleeding/
and SRAM Reverb hose shortening instructions:
Please be careful with razor knives, and as a side note, I found that removing the lever and twisting the lever in the same direction while pressing the hose barb in went much smoother than trying to grip the hose with a pair of pliers. I ended up with a hose 2 inches shorter from crushing the hose. I also let ONE DROP of fluid come out because I like a tiny bit of play in my lever. You speed up the adjuster on the lever to compensate for slow seat post return, but this is a personal preference.
I’m not going to give much info on the shortening / bleed procedure as I strongly suggest you take these tasks to a qualified mechanic. I have done both of these tasks before, and am in training to work a local shop so this was kind of a test for me. You don’t want the hassle. If you do try it and screw it up, be awesome and take your mechanic a 6-pack as an apology for giving them a semi-frustrating job.
Alright, that’s it for today. Tomorrow I’ll post the first ride bits (from today) and possible second ride (tomorrow). I’ll tell you I love the bike. LOVE THE BIKE.
If you have questions, want more details, thoughts, opinions, etc just let me know. I breezed through this but covered the major stuff. This isn’t designed to be a step-by-step guide to building a bike, just well….I don’t know what it is. It’s my blog.
WHA-CHA!!!


Pingback: 45650B part 4.0 – Selling my Baby and Welcoming a New Love | The Reality of the Situation.